The scenario to demonstrate the way to use Smart Routing fields
I> At the first step, we need to edit a spooled file to add several email addresses
- Login to iDocs and select option 5 to open window “iDocs Utility Menu”
- Save your spooled file to IFS by using option 3 “Save a Spool File”, normally, your spool will be saved at /FORMFMG folder
- Download your spool to PC, and open it with any text editor, add your email addresses for further demo
- Copy the new spool file back to /FORMFMG folder
- Restore your spooled file to any output queue by using option 7 “Restore a Spool File”, for example, the spool file was restored at TNGUYEN/TNGUYEN outqueue
- Review your spool file
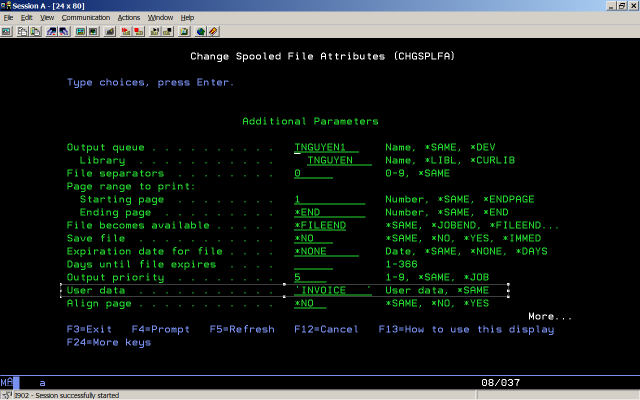
- Use command wrksplf YourLib/Outqueue, locate to your spool file, use option 2 “Change” to change property “User Data” to any value that will be used for further step. For example, at my side, we use command wrksplf TNGUYEN/TNGUYEN, and change property “User Data” to “INVOICE”.
II> Second step, open your EMF form with iMap, download the above spool for mapping
1. Drag/drop any spooled text as you like
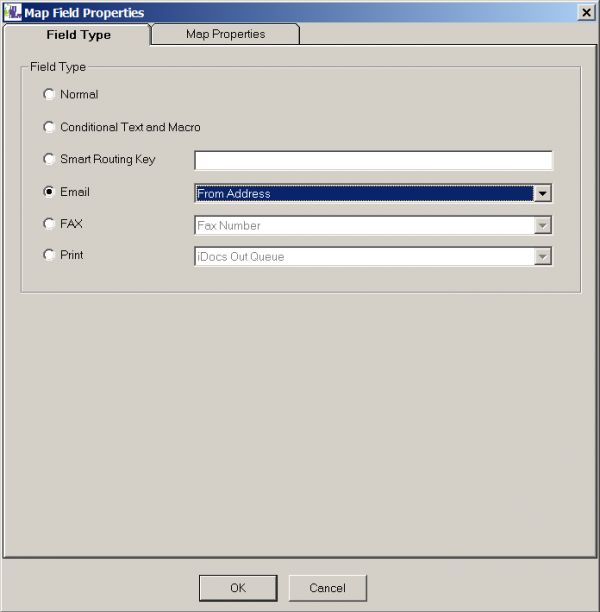
2. Drag/ drop an email address to right panel, open properties window, select option “Email” as field type, and from the next dropdown list, select “From Address” to create Smart Routing field “*TOADDRESS”, not that you should use your email as “*TOADDRESS” in order to check your mail box in further demo step.
3. Repeat the “2.” with other email addresses to create SR fields “*FADDRESS” , “*CCADDRESS”
4. Of course, you can create other SR fields such as *MESSAGE , *SUBJECT
5. Upload form/map to iDocs as form application INV1
III> Go back to iDocs main menu, open above form application
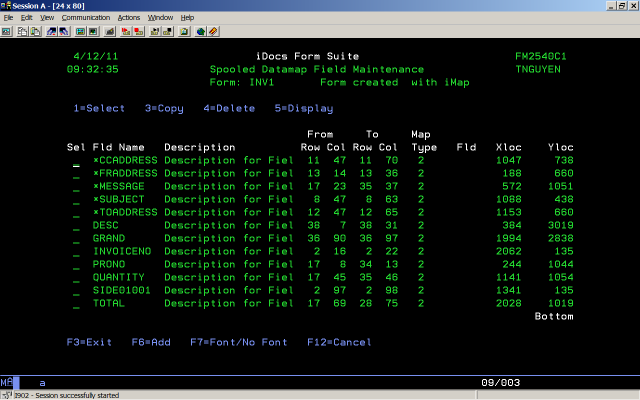
1. Select option 8 to review the list of mapped fields, for example, here is the list of fields of form application “INV1”
2. Select option 1 to open Form Application at mode editing, change field “Destination Out Queue “ to *EMAILPDF or *EMAILTEXT, press Enter to save the form application
IV> Define the merge engine
1. From main menu of iDocs, select option 4 “Work with Engines” to open window “Engine Definition Maintenance”
2. Press F6 to create a new one
3. Enter Engine Name, Description
4. Enter “Archive Out Queue”, “Archive Library”
5. Enter “Originating Out Queue” and “Originating Library”, make sure that “Originating Out Queue” is not the same with “Archive Out Queue”
6. Enter “Spool Attribute”, “Spool Attribute Value”, “Form App”, note that two values “Spool Attribute”, “Spool Attribute Value” is used for searching spooled files in “Originating Out Queue”
7. Enter “Resulting Out Queue” as *FORMDEF to indicate “Destination Output Queue” of Form Application (this value was set at step 3) will be used
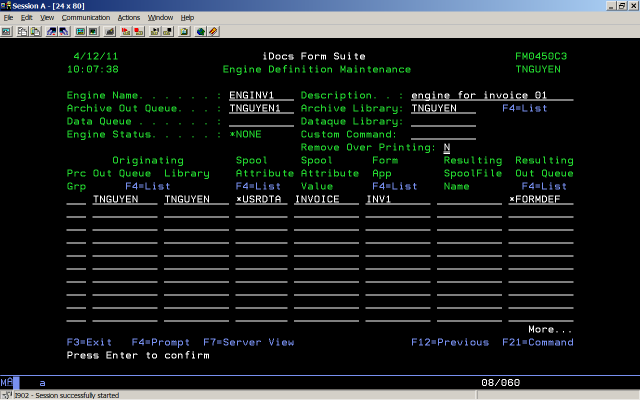
8. For example, in this demo, we create an engine with following properties
9. Use Option 8 “Start” to submit the merge job to QINTER for immediately running the job
10. Check your mail box to review the result


