Table of Contents
Using the iView Installer
Installation From the PC
Starting the Installation With the Installer Tool
The iView installer is designed to automate and thus decrease the time required to install iView. This section discusses the installer to iView 5.50.
Some of the messages refer to earlier releases but are otherwise identical to the current process.
- Step 1: Download and unpack the iView installer files into a directory on your pc.
- Step 2: Run the executable ivwInstaller.exe by double clicking on the object.
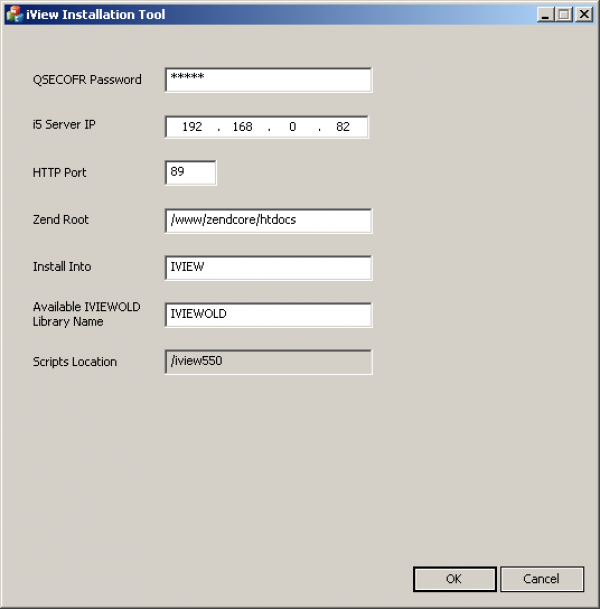
- Step 3: Complete the prompt screen show below. Your entries may not match those shown:
- I5 Server IP: the IP address of the IBM i5 server on which iView is being installed.
- HTTP Port: the tcp port on which the Zend http instance is listening. Zend installs itself to listen by default on port 89, however this is user configurable.
- Zend Root: the root of the Zend file system. Do not change unless you have installed the Zend PHP interpreter into a non-standard location.
- Install Into: The name of the iView library to install into. Normally this will be IVIEW.
- Available IVIEWOLD Library Name: An unused library name to move any existing iView installation into. This is the backup copy. Leave set to IVIEWOLD if this is a new installation.
- Scripts Location: This is not changeable in this installation but may be changed manually in the file system and Apache configuration.
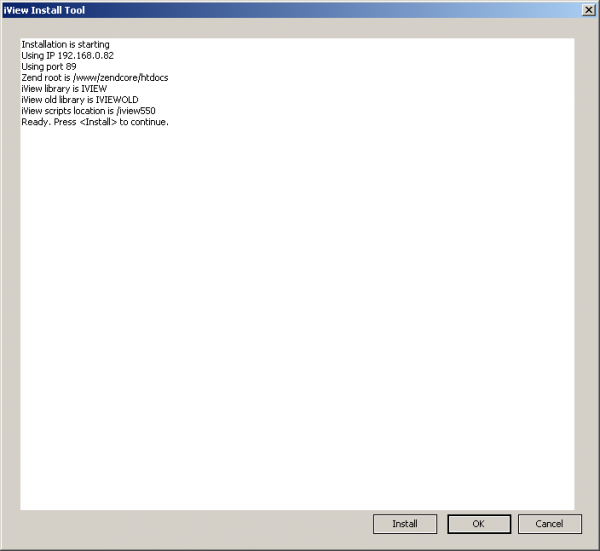
Once complete click OK. The installer run screen opens.
Click Install to run the installation procedure.
The installer will upload the files it needs to your server. The ftp messages will display in the dialog. When finished, it will launch the browser for the next step. You may close the Installer dialog at this time and turn your attention to the browser.
Continuing the Installation In The Browser
Before you work with the browser however, grant adequate authority to the Zend profile NOBODY to continue by executing the command:
CHGUSRPRF USRPRF(NOBODY) SPCAUT(*ALLOBJ *JOBCTL)
Now at the browser:
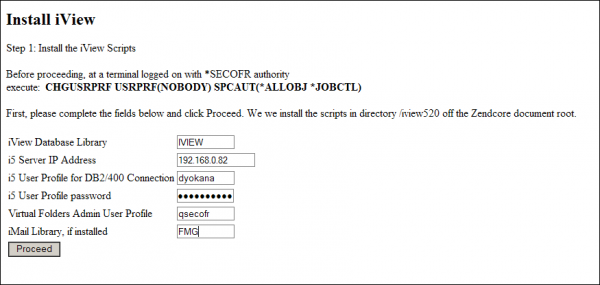
Complete the following information:
- IVIEW database library: Normally this is IVIEW.
- I5 Server IP: The IP address by which your server knows itself. This should match the information previously given.
- i5 User Profile for DB2/400 Connection: The i5 profile used to connect to the iView databases. This can (and should) be a normal profile with just enough authority to access the tables in library IVIEW. For more on this go ⇒ here
- i5 User Profile Password: password for the above normal profile.
- Virtual Folders Admin User Profile: specify a user profile to server as the Virtual Folders administrator, and the iView general administrator. No specific authority is necessary, but this profile can't use Virtual Folders as a normal user.
- iMail Library, if installed: If you use iMail and would like to use it to email copies of the archived PDF documents (you can also use your regular desktop email client) then specify the library containing iMail here. Normally this is FMG.
When ready, click PROCEED.
The first screen will list actions take to install the scripts, and any messages generated by the server. Click Proceed when ready.
The second screen shows the command executed to restore the greenscreen load program into QGPL, as well as any system messages. When ready, click Proceed.
This screen displays after writing the configuration information you specified into the scripts configuration files i5_def.php. At this point you may close the browser and open a greenscreen terminal.
Greenscreen Installation Steps
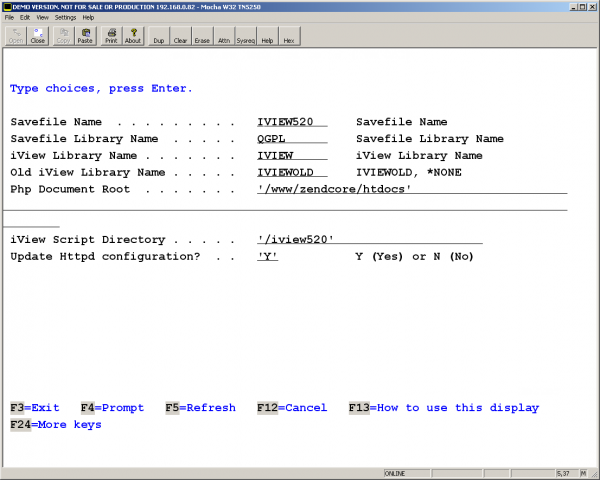
Make certain you have QGPL in the library list, are logged on QSECOFR, then use F4 to prompt the command:
IVWLOAD
This screen should display with all the defaults correct. The one decision only should be if you want to have IVWLOAD update your Zend Apache configuration. The default is Yes, and this is recommended unless you run a very customized environment.
Press <enter> to proceed.
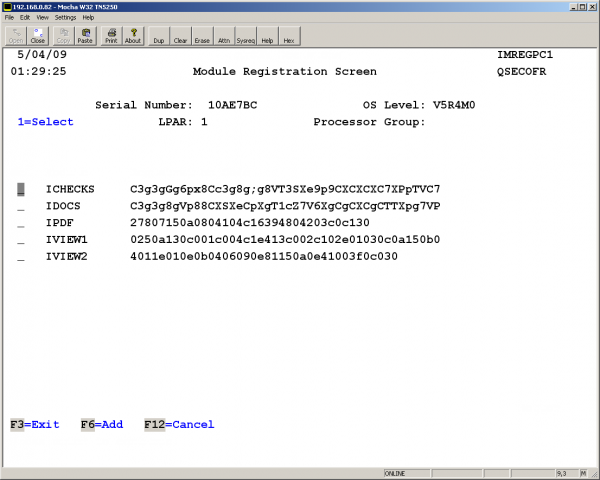
If you have keys to install you may enter or update them here. If this is an upgrade your keys should have carried forward. When done, press F3 to exit the registration screen.
Note: If you get blank pages in iView, edit /usr/local/Zend/Core/etc/php.ini and add the statement:
zend_optimizer.license_path=/www/zendcore/htdocs/iview550
zend_optimizer.enable_loader = 1
to the file. iview550 is the installation directory which will vary in releases.
The installation is complete; please review the additional installation steps below and execute those that apply to your circumstances.
Additional Installation Actions
In addition to the above the following may be necessary:
If the user profile entered as “i5 User Profile for DB2/400 Connection” lacks adequate authority to the iView files, execute these commands
(presuming a user profile of IVIEWUSR):
GRTOBJAUT OBJ(IVIEW) OBJTYPE(*LIB) USER(IVIEWUSR) AUT(*ALL)
GRTOBJAUT OBJ(IVIEW/*ALL) OBJTYPE(*FILE) USER(IVIEWUSR) AUT(*ALL)
If you are installing the standalone version ( i.e. iDocs is not installed in the partition ):
Setup the iPDF pcl to pdf converter with this command:
IPDFSETUP LIBRARY(IVIEW) IFSSAVF(LJ4FONTS)
If you installing the integrated version ( i.e. iDocs is installed in the partition ) then you will use the version of iPDF in iDocs.

